 Español
  pусский
  Français
  Português
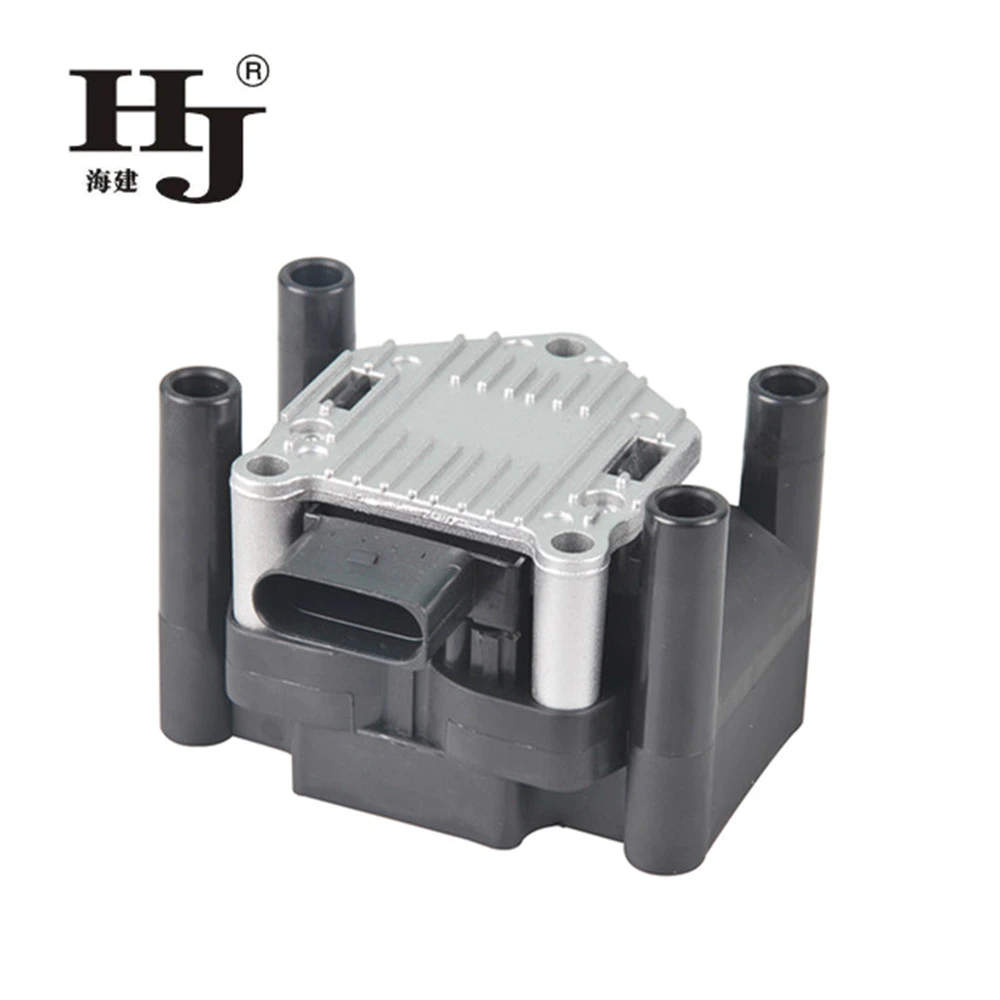


Better Touch Better Business
Contact Sales at Haiyan.
A Step-by-Step Guide on Replacing Your Car's Ignition Coil
Introduction
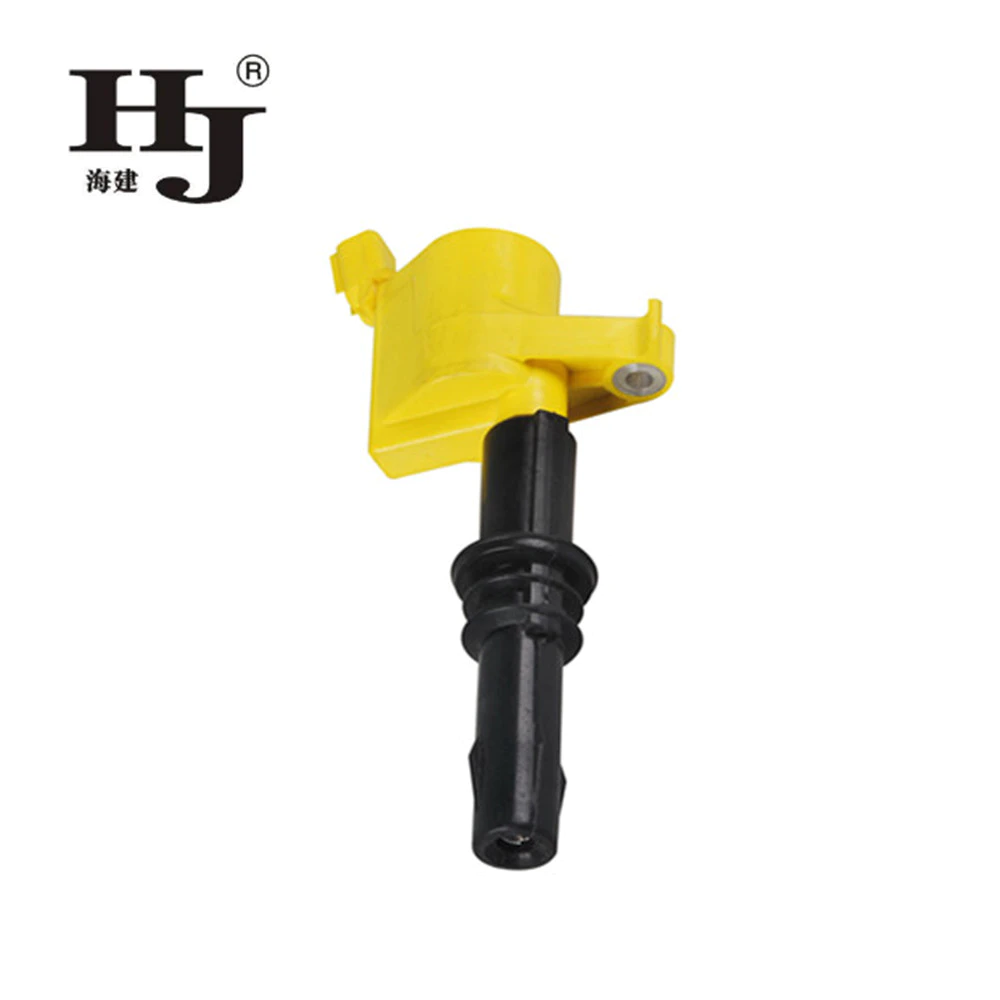
Overview of the Ignition Coil
When Should the Ignition Coil be Replaced?
Tools and Supplies Needed
Step 1: Disconnect the Battery
Step 2: Locate the Ignition Coil
Step 3: Remove the Old Ignition Coil
Step 4: Install the New Ignition Coil
Step 5: Reconnect the Battery
Conclusion
Introduction
The ignition coil is a vital component of your car's ignition system that is responsible for generating the necessary voltage to power the spark plugs. Over time, the ignition coil may wear out, leading to various issues such as misfires, poor fuel efficiency, and overall decreased performance. Fortunately, replacing the ignition coil is a relatively straightforward process that can be done at home with the right tools and knowledge. In this article, we will provide you with a step-by-step guide on how to replace your car's ignition coil.
Overview of the Ignition Coil
The ignition coil is an electromagnetic device that transforms the low voltage from the battery into the high voltage necessary to create a spark in the spark plugs. This spark ignites the air-fuel mixture in the engine cylinders, allowing combustion to occur. Without a properly functioning ignition coil, your car's engine may not start, or it may run poorly.
When Should the Ignition Coil be Replaced?
The lifespan of an ignition coil can vary depending on various factors such as the make and model of your vehicle, driving conditions, and maintenance history. However, as a general guideline, it is recommended to replace your ignition coil every 100,000 miles or if you start experiencing any of the following symptoms:
1. Frequent misfires or backfires: If you notice that your engine is misfiring or backfiring, it could be a sign of a faulty ignition coil.
2. Rough idle: A worn-out ignition coil can disrupt the spark plugs' normal operation, causing the engine to vibrate or idle roughly.
3. Decreased fuel efficiency: A failing ignition coil may lead to incomplete combustion of the fuel, resulting in lower fuel efficiency and increased fuel consumption.
4. Difficulty starting the engine: If your car struggles to start or requires multiple attempts to start, it could indicate a failing ignition coil.
5. Engine stalling: When the ignition coil malfunctions, it can cause the engine to stall unexpectedly, which may pose a safety hazard.
Tools and Supplies Needed
Before beginning the replacement process, gather the following tools and supplies to ensure a smooth procedure:
1. New ignition coil: Make sure to purchase the correct ignition coil for your car's make, model, and engine size.
2. Socket set: A socket set with various sizes will be necessary for removing bolts and screws.
3. Screwdrivers: Both Phillips and flathead screwdrivers will be needed for different parts of the procedure.
4. Adjustable wrench: An adjustable wrench will come in handy for loosening bolts.
5. Dielectric grease: Applying dielectric grease to the spark plug boot and ignition coil connections will help prevent moisture damage and ensure a strong electrical connection.
Step 1: Disconnect the Battery
To ensure your safety and prevent any electrical mishaps, start by disconnecting the negative terminal of the battery. Locate the negative terminal, usually labeled with a minus (-) sign, and use a wrench or socket to loosen and remove the terminal connector. Securely tuck the connector away from the battery to avoid accidental reconnection.
Step 2: Locate the Ignition Coil
The ignition coil is usually located near the engine, either on the cylinder head or the intake manifold. Consult your vehicle's repair manual or look for online resources specific to your car's make and model to determine the exact location. Once located, examine how the ignition coil is secured in place, as this may vary between vehicles.
Step 3: Remove the Old Ignition Coil
Using the appropriate tools, carefully remove any components obstructing the removal of the ignition coil. Depending on the vehicle, these components may include engine covers, air intake hoses, or other accessories. Once access is gained, disconnect the electrical connectors and ignition coil mounting bolts. Take note of the order in which the wires are connected to the ignition coil or use colored markers for reference when installing the new ignition coil.
Step 4: Install the New Ignition Coil
Before installing the new ignition coil, apply a thin layer of dielectric grease to both the spark plug boot and electrical connectors. This will aid in moisture protection and improve the conductivity of the electrical connections. Carefully align the new ignition coil with the mounting holes and reattach the electrical connectors. Finally, tighten the mounting bolts securely, making sure not to overtighten.
Step 5: Reconnect the Battery
After successfully installing the new ignition coil, it is time to reconnect the battery. Position the negative battery terminal connector back onto its corresponding post and tighten it with a wrench or socket. Ensure a snug fit without excessive force. With the battery reconnected, you can now start your car and test the new ignition coil.
Conclusion
Replacing your car's ignition coil can significantly improve the engine's performance and prevent potential issues down the road. By following this step-by-step guide, you can safely and effectively replace your car's ignition coil at home. Remember to consult your vehicle's repair manual or seek professional assistance if you encounter any difficulties during the process.
Copyright © 2019 Haiyan aijian Co.Ltd. | All Rights Reserved
Hello, please leave your name and email here before chat online so that we won't miss your message and contact you smoothly.